LearnPython has the Biggest Discount Ever! ------ Get $349 $129 Lifetime Access to all 13 Python Courses
Django Migrations Tutorial: How to Make Migrations in Django.
This post will show you how to do migrations in a Django project. Creating migrations and then applying them to the database are two separate steps in the Django migration process. The makemigrations command is used for the former, and the migrate command for the latter.
What are Migrations in Django?
Django migration is a way to update your project’s database schema to make it resembles the current structure of your Django models. Additionally, Django gives you the option to undo these changes if necessary. Migrations help to keep the database in sync with the Django models.
Migrations are Important for a Number of Reasons:
- Migrations allow safe and controlled changes to models and database schema.
- Migrations help you track model and database schema changes. This helps you understand how your database has changed and, if needed, recreate it.
- Migrations allow developers to work together without causing database conflicts. Django’s migration framework lets each developer work on their own migrations.
- Migrations let you deploy your Django project to different environments without recreating the database. This makes deployment much easier and more reliable.
Overall, Django migrations are an essential tool for managing and maintaining the database of a Django project.
Creating a migration:
To create a migration using Django’s makemigrations command, follow these steps:
Step 1: Make all the Necessary Changes to your Django Models.
Check that you have made all the necessary changes to your Django models in the models.py file. These changes include adding a new model or field, changing the type of an existing field, or deleting a field.
Step 2: Run the makemigrations command
In the terminal of your Django project, run the makemigrations command. You can run it without any arguments to create migrations for the whole project; But it is a best practice to make migrations for one app at a time, therefore you have to specify the name of the app for which you want to create the migration. For example:
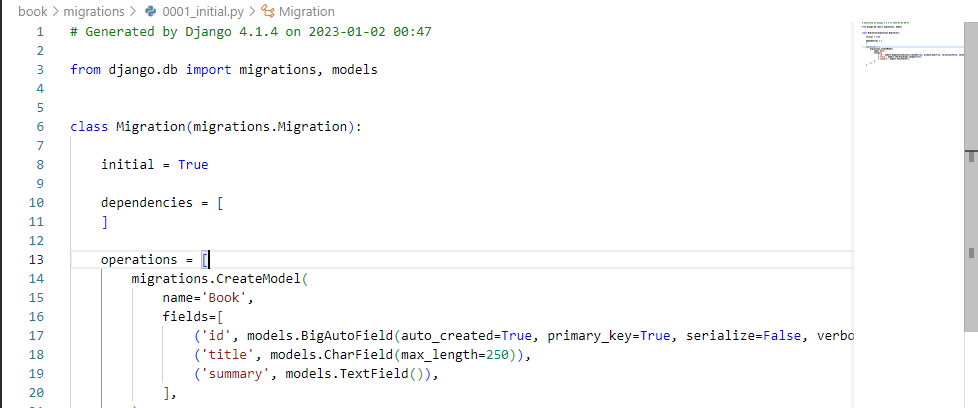
$ python manage.py makemigrations myappAfter this command runs, you should see a new migration file in the migrations directory of the myapp app.
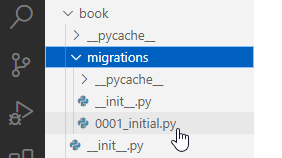
The migration file will contain the necessary instructions to apply and revert the changes you made to your models.
Additional Arguments
There are more additional arguments you can add to customize your migration process:
Including Only Certain Changes in the Migration
I’ve said above that you can make many changes to the models.py file, like adding a new model or field, changing the type of an existing field, or deleting a field. Among all these changes, what if you want to create a migration only for a certain change?
The best approach is to create an empty migration file by adding the --empty option to create an empty migration and the --name option to name the file. After the file gets created, you can then write the migration code manually for that change.
Here’s an example:
$ python manage.py makemigrations myapp --name delete_title_model --emptyThis will create an empty migration file called delete_title_model, which you can then edit manually to include the desired changes. You can check other migration files to have an idea of how the migration code is written.
Including Changes From all apps in the Same Migration
If you want to include changes from all apps in the same migration, you can use the --merge option. For example:
$ python manage.py makemigrations --mergeThis will create a single migration file with the necessary instructions to apply and revert the changes from all apps.
That’s it! You have now created a migration using Django’s makemigrations command. Let’s now apply the migrations to the database.
Applying a migration:
To apply a migration using Django’s migrate command, follow these steps:
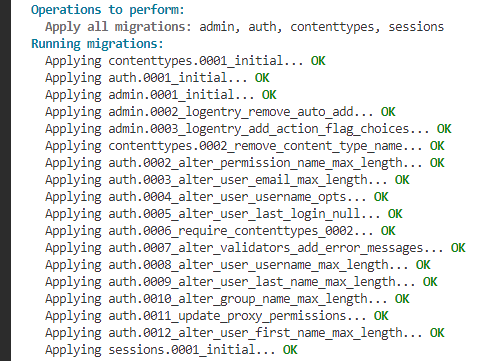
Step 1: Run the migrate command
Run the migrate command and specify the name of the app for which you want to apply the migration. For example:
$ python manage.py migrate myappThis will apply any pending migrations for the myapp app. Pending migrations are migrations that have not yet been applied to the database.
Additional Arguments
Applying a specific migration
If you want to apply a specific migration, you can simply specify the name of the migration file that contains the migration code for the change. For example:
$ python manage.py migrate myapp 0001_initialThis will apply the 0001_initial migration for the myapp app.
Applying all Migrations for all Apps
If you want to apply all migrations for all apps, you can use the --all flag. For example:
$ python manage.py migrate --allThis will apply all pending migrations for all apps to the database.
Roll back a Migration
If you want to roll back a migration, you can use the --backward flag.
For example:
$ python manage.py migrate --backwardThis will roll back the last applied migration for the myapp app to the database.
Applying all Migrations to a Specific Database
On the occurrence of your Django project having multiple databases, you may want to apply certain migrations to certain databases. To do that, you can use the --database option and assign the name of the database like below:
$ python manage.py migrate myapp --database=mydatabaseThis will apply the pending migrations for the myapp app to the mydatabase database.
The --database option also works with other options. For example:
$ python manage.py migrate myapp 0001_initial --database=mydatabaseThis will apply the migration in the initial file to the specified database.
$ python manage.py migrate --database=mydatabase --allThis will apply all the migrations for all apps to the specified database.
$ python manage.py migrate myapp --database=mydatabase --backwardThis will roll back the last applied migration for the myapp app to the database mydatabase.
If you have only one database in your Django project, don’t bother using the --database option as Django will automatically use that database.
That’s it! You have now applied a migration using Django’s migrate command. Remember to commit any changes to the database to version control so that they can be applied on other environments.
FAQs on Django Migrations
Should I commit Django migrations?
Yes. You should commit your Django migrations because they are a representation of the changes you have made to your models. These changes include adding, modifying, or deleting fields, as well as creating, renaming, or deleting models. Committing the migrations helps to keep track of these changes, which can be useful for several reasons:
- It allows you to roll back to a previous version of your models if you make a mistake or want to undo some changes.
- It helps others who are working on the same project to see what changes have been made, and it helps to ensure that everyone is working with the same version of the models.
- It can be useful when deploying your code to a production environment, as it allows you to apply the necessary database changes automatically.
In summary, committing your Django migrations can help you to keep track of changes to your models and to roll back changes if necessary. It can also be useful for collaboration and deployment. Check out how to upload a Django project to Github.
When should I run Django migrations?
You should run Django migrations whenever you make changes to your models. This includes adding, modifying, or deleting fields, as well as creating, renaming, or deleting models.
It’s important to note that you should only run migrations on your development machine, and not on a production environment. In a production environment, you should deploy your code with the migrations already applied. This ensures that the database is in a consistent state when the code is deployed.
Conclusion: Django Migrations Tutorial
In conclusion, Django migrations are a powerful and essential tool for managing and maintaining a Django project’s database. They allow you to make changes to your models and database schema in a controlled and reversible way, and to keep your database in sync with your Django models.
By following the steps outlined in this post, you can create and apply migrations using Django’s makemigrations and migrate commands. Whether you are working on a small project or a large team, Django migrations will help you keep your database up-to-date and under version control.
If you have any questions, let me know in the comments section below. Peace!
