LearnPython has the Biggest Discount Ever! ------ Get $349 $129 Lifetime Access to all 13 Python Courses
How to Install and Set up FastAPI Project on Your Computer: pip install fastapi.
This step-by-step guide will show you how to install FastAPI and set up a FastAPI project on your computer. We will start with a few requirements needed before one can install FastAPI and create a web project with it, then we will go step by step into installing FastAPI along with other dependencies. Last but not least, we will create a simple Greeting web app that displays Hello World.
This tutorial is meant for absolute beginners to the FastAPI web framework, most probably for someone who knows nothing about web development in general but with a considerable amount of understanding of any programming language. If you’ve been using some Python web development frameworks like Flask or Django, there are some sections in this post you will already be familiar with, feel free to skip them. By the end of this tutorial, you’ll have learned the very basics of FastAPI and are ready to dive into more profound concepts.

Just as a brief introduction, FastAPI is a Python web development framework that allows you to create web APIs as fast as possible. Just like Flask, it identifies itself as a microframework that works with the help of other modules. This is the opposite of Django’s ‘batteries included’ architecture where most features come pre-installed and ready to be used. This allows FastAPI to be flexible and to be used for many applications.
According to Wikipedia, some giant tech companies that are already using it are Uber and Netflix. I will write an article getting in detail about what FastAPI is, its features, and how it compares with other Python frameworks. For now, let’s get into what we’re here for. That is installing FastAPI on your computer.
Table of Contents
- Hold Up! Before You Install FastAPI on Your Computer…
- From Now Moving On:
- Virtual Environment tools.
- How To Install FastAPI on your computer.
- 3. Install FastAPI
- How To Create A FastAPI Project.
- Bonus: FastAPI Automatic Documentation.
- FAQs: How To Install FastAPI.
- Where To Go From Here.
Hold Up! Before You Install FastAPI on Your Computer…
Download and Install Python
Just like I’ve said above, FastAPI is a web development framework that was created using the Python programming language, hence Python is required for it to function. Python will be the language you use to write the majority of the code for FastAPI. Therefore, before installing FastAPI, you must first install Python on your computer.
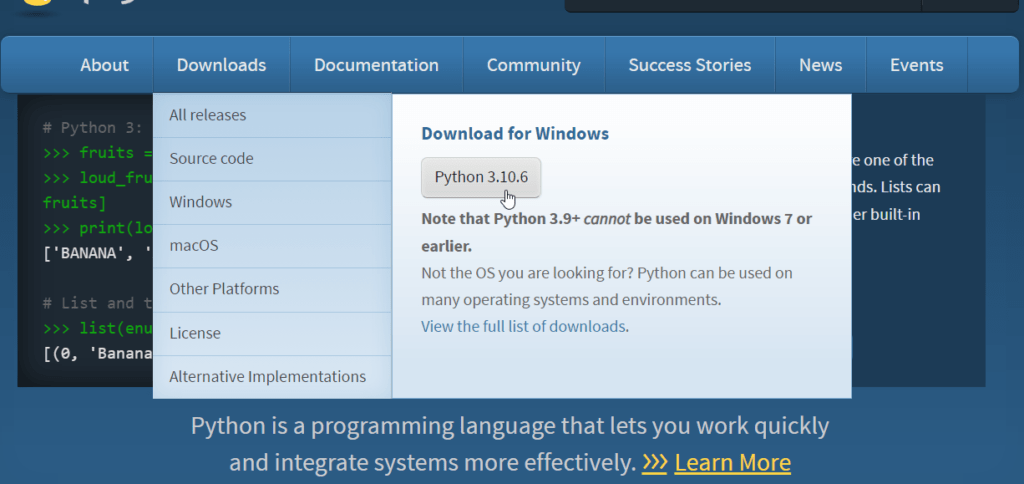
The safest method to install Python is to download an installer from Python’s official site and run it on your computer. Before you do that though, it is always wise to check if you do not already have Python installed on your computer.
1. Check if Python is not Installed Already
To do that, open your terminal and type the following code.
$ python --versionOR
$ python3 --versionon mac.
If it is installed, the terminal will display the version of Python installed on your computer.
2. Check If the Version is Python 3.6+
FastAPI works with at least Python 3.6, therefore, if your console returns a version below that, unfortunately, you cannot just upgrade it with pip just like you do to with modules (because pip itself is under Python). Therefore, you have to go to Python’s official site and download the latest version then run the installer on your computer.
3. If Python Is Not Installed On Your Computer
If the terminal returns some kind of error like 'python' is not recognized as an internal or external command, operable program or batch file, this means Python is not installed on your computer. Go to Python’s official site and install the latest version.
If you’re on Mac and Linux, alternatively, you can use Homebrew to install Python from the terminal.
Run the following command:
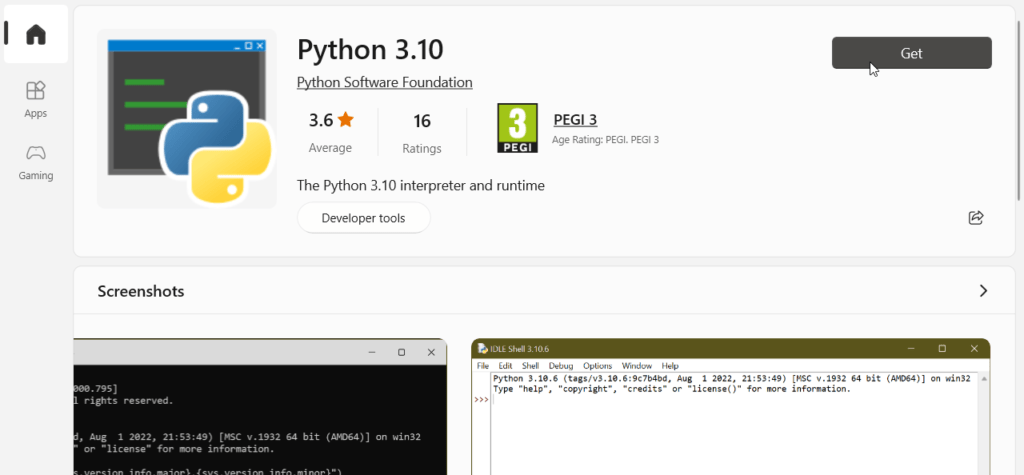
$ brew install python3If you’re on Windows, good thing. After the error message, Windows will open Microsoft Store to where you can download Python from.
If you used the installer method, make sure you check the ‘Add Python [version] to PATH’ checkbox at the bottom before you hit the ‘Install Now‘ button. This is very important, make sure you do it!

Section: Check
These are things you have to make sure you’ve accomplished in this section before you move to the next:
☑ You have Python3.6+ installed on your computer.
Let’s move on.
From Now Moving On:
This post is intended for users of all the major computer operating systems. i.e Windows, macOS, and Linux. However, I will write from a Windows user’s perspective, where needed, I’ll explain what one should do if on a different OS. There is one gotcha I should address though.
If you’re on a mac, your pip and python keywords should be suffixed with 3 to specify the version you’re using. This is because mac computers come preinstalled with Python 2. But remember you installed Python3 earlier so you now have 2 versions of Python on your computer. If you do not suffix pip and python with 3, it will assume you want to use Python 2. So be careful!
Virtual Environment tools.
A virtual environment is like a box inside your computer that does not share what it has with the rest of the system. One advantage of virtual environments is that they separate your project and its dependencies from the system of the computer so that they cannot conflict with other packages installed. Consider a scenario in which you are developing two FastAPI projects at the same time, but they utilize different FastAPI versions. Installing two different FastAPI versions separately—one for one project and another for the other—will be the most ideal. The idea here is that for every FastAPI project you create, you should install a FastAPI copy for that specific project.
A virtual environment is just a folder where the dependencies you install for your project will be stored, instead of them being stored globally on your computer.
Venv, virtualenv, and pipenv are three of the most widely used virtual environment tool options in the Python community. Venv comes together with Python so you do not have to install it but if you plan to use the other two, then you have to install them. In this post, I’ll use venv simply because it comes preinstalled but my recommendations are virtualenv for Windows, pipenv for mac. On Linux, you can use both just fine.
Now that we have an idea of what virtual environments are and why we use them, let’s get into creating one, then installing FastAPI, and ultimately creating a project. This will be done step by step.
How To Install FastAPI on your computer.
1. Create A Virtual Environment.
Create a folder on your computer and give it the name of your project. I will create a HelloWorld folder on my desktop. Now open your terminal and navigate to that directory.
$ cd desktop\helloworldIn that folder, we want to create the virtual environment. Run the following command to create a virtual environment called env.
desktop\helloworld $ python -m venv envThe name of the virtual environment can be anything (as long as it followings folder naming guidelines on your OS). The most commonly used names are env, venv, and .env. This is done to make them easily identifiable as a virtual environment among other folders in your project.
After the command runs, there should be a new folder in your project folder called env or the name you gave it.
Check it out by typing the dir command on Windows or ls on Linux and mac.
2. Activate The Virtual Environment
Now that our virtual environment has been created, it is time to activate it. The most ideal thing to do at this point is to open your project folder with a text editor. Most text editors come with an integrated terminal. We can use that without having to mess with changing directories kind of thing.
To activate the virtual environment, there are some things we have to understand. The file that contains the code to activate the virtual environment is stored somewhere in the virtual environment folder (that is the env folder we’ve created before). All we have to do is to run that file in our terminal.
This is where the file is located.
On windows.
env
├── Include
├── Lib
│   ...
├── Scripts
│   ...
│   ├── activate.bat (The file we're looking for)
│   ...
└── pyvenv.cfg
On Mac and Linux
env
├── Bin
│   ...
│   ├── activate (The file we're looking for)
│   ...
├── include
├── Lib
│   ...
├── Lib64
│   ...
└── pyvenv.cfg
Did you see it? activate.bat is the file we’re looking for. And as you can see, its path is env\scripts\activate.bat on Windows or env\bin\activate on Mac and Linux.
So in our terminal, we just have to run file. Here is how to do it. [Make sure in your terminal you’ve navigated into the project folder]
$ .\env\scripts\activateOR
$ source env\bin\activateOn Mac
Note:
➤The period at the beginning tells the command to look for the file starting from the folder we’re currently in.
➤On Windows, it is in the scripts folder while on mac it is in the bin folder.
➤You don’t have to explicitly state the extension of the file. That is the .bat at the end. It works just the same whether you include it you don’t.
➤If you notice, there are also other files in the scripts folder like the deactivate.bat file which in turn is used to deactivate an active virtual environment.
After the command runs. You should notice the name of the virtual environment in parenthesis before the path of your current location in the terminal.
(env) $This tells us that the virtual environment is now active and ready to start getting some installations. This leads us to the next step.
3. Install FastAPI
Finally, we can install FastAPI in our project and start using it to build Web APIs. The easiest way is to install FastAPI using pip. So in your terminal run the following command.
(env) $ pip install fastapiNote:
➤The virtual environment is activated.
➤Remember for mac users you have to specify pip3.
Checking back your virtual environment folder, inside the Lib folder, you should see some folders that indicate FastAPI is installed. Thus FastAPI is installed only for that project. If you deactivate your virtual environment or navigate to another folder that is not part of your project folder and type pip show fastapi, you should receive some kind of error.
For now, that’s done. Let’s go and create a simple web project with FastAPI.
How To Create A FastAPI Project.
When setting up a FastAPI project, you’ve already done more than 70% of the work just by installing FastAPI in an active virtual environment. What’s left now is to create a file where will we write our code, after that, we serve the application so we can view it from the browser.
Let us continue from where we left off. In our HelloWorld folder, let’s create a file called helloworld.py. The project structure should look like below:
HelloWorld
├── env
└── helloworld.py
In our helloworld.py, write the following code. (I’ll explain what it is doing)
➊from fastapi import FastAPI
➋app = FastAPI()
➌@app.get('/')
➍def greeting():
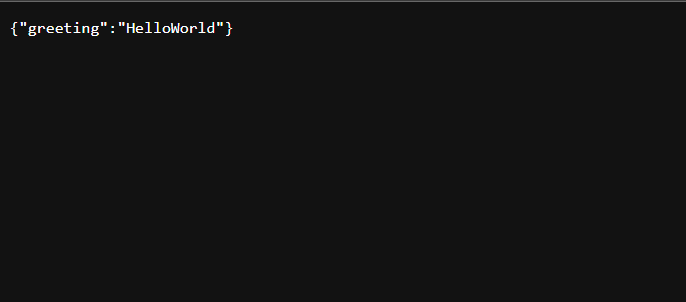
return {'greeting': 'Hello World'}Here is what the code is doing:
➊ we import FastAPI so we can use it in our file.
➋Then we create an instance of FastAPI and store it in a variable called app.
➌We then create a route. Basically what it is saying is, that if a GET request is sent to the home page (the slash '/'), render the code below.
➍Below the route, we create a function called greeting that will get called when a client sends a GET request to the home page. It returns a dictionary with a single key-value pair. The key is ‘greeting’ while the value is ‘Hello World’.
It is time to view this web app in real-time from our browser. We have to use some kind of server but because FastAPI is a microframework, it does not come with any preinstalled servers. Therefore we have to install one. There are quite a few options we can choose from. But for this project, we will use Uvicorn. In your project folder let’s install Uvicorn. (make sure the virtual environment is activated)
(env) $ pip install uvicornAfter the command runs, we can now run our uvicorn server.
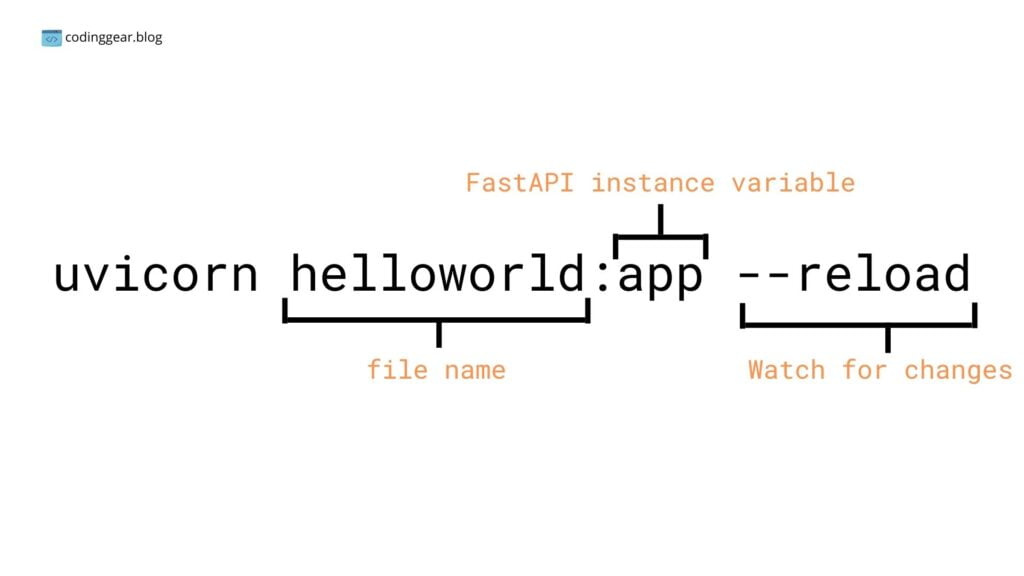
(env) $ uvicorn helloworld:app --reloadIt should return something like:
INFO:     Will watch for changes in these directories: [folder path]
INFO:     Uvicorn running on http://127.0.0.1:8000 (Press CTRL+C to quit)
INFO:     Started reloader process [8712] using StatReload
INFO:     Started server process [5448]
INFO:     Waiting for application startup.
INFO:     Application startup complete.
Let me explain what we’ve just done here:
helloworld: the name of the file that contains the code we want to run.
app: the instance of the FastAPI class.
–reload: This is an optional argument that tells the server to reload whenever we make a change to our code in the project folder. Our first INFO tells us so. It is a good practice to always add this argument whenever we run the server even on small projects like this so that we do not have to quit and rerun the server every time we change code.
Here is a little something for you:
That’s it. Look at the second INFO, it tells us that the server is running on localhost port 8000 (http://127.0.0.1:8000). Let’s navigate to that URL in our browser. There we go, you can see our web app right there.
I know, this site is not going to do anything really cool, but that’s exactly where we start from. The very basics. So you should consider this your first FastAPI application.
Bonus: FastAPI Automatic Documentation.
What we did was just preview our site in raw data. FastAPI has two fantastic automatic documentation. One is Swagger and the other Redoc. I will show you how to view your app in Swagger for this post.
In your browser, add /docs next to your URL so it becomes http://127.0.0.1:8000/docs.
After the page loads, you should see nice-looking documentation about our app. There are our defined routes. You should only see one GET route called Greeting as it is the one we created.
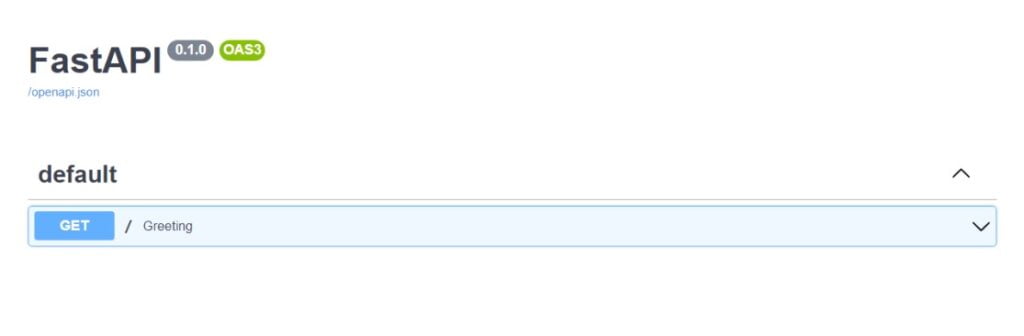
Click on the dropdown icon at the right end.
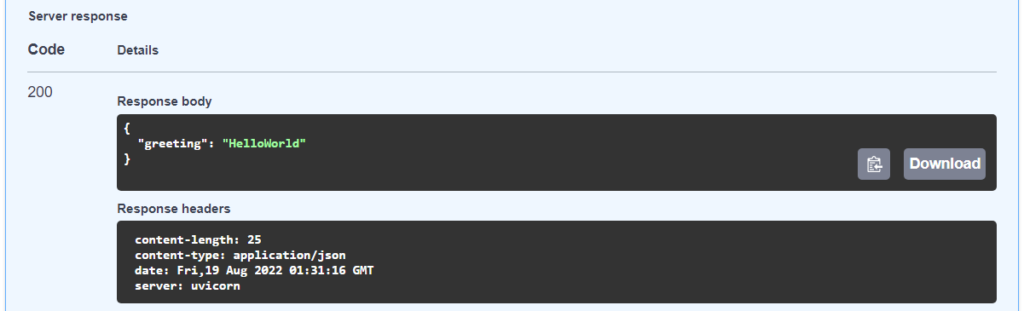
Click on the ‘Try It Out‘ button, then the ‘Execute‘ button.

Under server response, you should see our greeting in a nice-formatted structure.
FAQs: How To Install FastAPI.
Below are some of the frequently asked questions on how to install FastAPI and build a project with it. You may also be asking the same questions.
How Do I Install FastAPI and Uvicorn.
In this guide, we installed FastAPI and Uvicorn separately. But you can install the two all at once by running: pip install fastapi uvicorn, in your project folder. This is a really good practice if you already know that you will be using Uvicorn to serve your FastAPI application.
(env) $ pip install fastapi uvicornWhere To Go From Here.
Did you succeed in downloading and installing Python, in setting up a virtual environment, in installing FastAPI, and in creating your first FastAPI project? Congratulations! You now understand what it takes to install FastAPI on your computer and how to do it the best way possible. That is, if you responded positively to the aforementioned questions.
Now that FastAPI has been installed on your computer, you may begin creating your second FastAPI project. To study FastAPI, you might need to find several top books. Even the best Python books can help you brush up on your python knowledge before diving into FastAPI.
I’ll see you in other Coding Gear guides. Peace!
