LearnPython has the Biggest Discount Ever! ------ Get $349 $129 Lifetime Access to all 13 Python Courses
Creating A Superuser In Django: A Beginner’s Guide
A superuser in Django is a special type of user account that has all the permissions and privileges to manage the Django project. A superuser can create, edit, delete, and view any data or content in the project, as well as access the Django admin interface. Having a superuser is important for setting up and maintaining the project, as well as troubleshooting any issues that may arise.
There are two methods to create a superuser in Django: using the command line or using the Django shell. In this article, we’ll explain how to use both methods and what are the advantages and disadvantages of each one.
Table of Contents
- Method 1: Using the createsuperuser Command
- Some things to note about this method:
- 2. How To Create Django User From The Django Shell
- Conclusion:
Method 1: Using the createsuperuser Command
The easiest and most popular way to create a superuser in Django is to use the createsuperuser command. You simply have to type the command: python manage.py createsuperuser in your terminal and you’ll be prompted to enter first your username, then your email, and finally your password. Then you can use those details to login into the admin interface.
Here is how to do it.
Step 1: Migrate Your Database
The createsuperuser command uses Django’s authentication system which comes preinstalled in the latest versions of Django. You can see this in the list of installed apps in the settings.py file of your Django project folder. That’s the django.contrib.auth on line 5 of the snippet code below.
Python
# project folder/settings.py

INSTALLED_APPS = [
    'django.contrib.admin',
    'django.contrib.auth', # right here
    'django.contrib.contenttypes',
    'django.contrib.sessions',
    'django.contrib.messages',
    'django.contrib.staticfiles',
]
This means that you don’t really have to care about the installation of Django’s authentication system. Django has already done that for you. However, before you create a superuser, you must migrate your database so that these installed apps can be recorded in the database.
Run the following command in your terminal to migrate.
$ python manage.py migrateStep 2: Open The Terminal & Run The createsuperuser command
Open a terminal and navigate to the root directory of your Django project. This is where the manage.py file is located.
Run the following command: python manage.py createsuperuser. You will be prompted to enter some information for the superuser, such as username, email, and password. Enter the details as required and press Enter after each one.
Make sure you remember the details you provide here for you are going to use them to log into the admin panel.
Bash
$ python manage.py createsuperuser
Username (leave blank to use 'computername'):
Email:
Password:
Password (again):
Superuser created successfully.
If everything goes well, you will see a message saying “Superuser created successfully.” Congratulations, you have just created a superuser in Django!
Step 3: Access the Admin
Run the following in your terminal to run the Django development server.
$ python manage.py runserverNow that the server is running, in your browser, navigate to http://127.0.0.1:8000/admin/.
You now see this page.
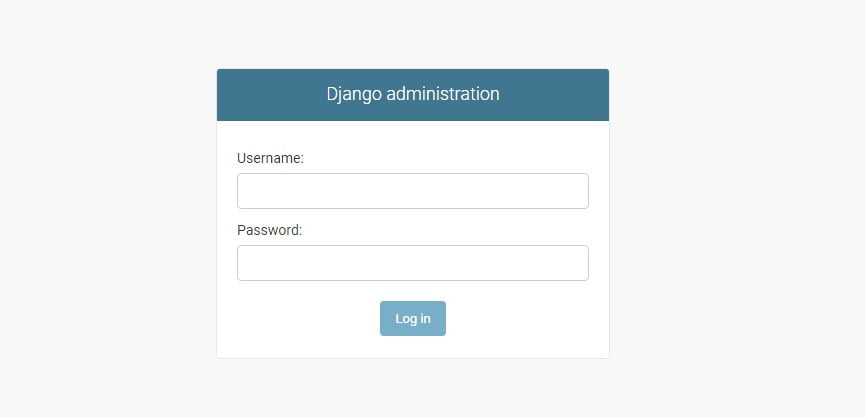
Type the username and password you’ve created before and hit the Log in button. And You’re In! To learn more, check out how to access the admin panel.
Some things to note about this method:
- The username and password are case-sensitive, so make sure you remember them correctly.
- The email is optional, but it is recommended to provide one for security and recovery purposes.
- The password must meet the minimum length and complexity requirements set by Django. By default, the minimum length is 8 characters and the password must not be too common or entirely numeric. You can change these settings in the AUTH_PASSWORD_VALIDATORS setting in your settings.py file.
- If you enter an existing username or email, you will get an error saying “That username is already taken.” or “That email address is already in use.” You will need to choose a different one or delete the existing user first.
- If you want to skip some of the prompts or provide default values, you can use flags or arguments with the createsuperuser command.
For example,python manage.py createsuperuser --username admin --email admin@example.com --noinputwill create a superuser with the username admin, email admin@example.com, and a random password without asking for any input.
Advantages:
- This is the easier and faster method, especially for beginners. You don’t need to write any code or edit any files manually.
- This method does not require you to know how the User model works or how to interact with it in code.
Disadvantages:
- This method is less flexible than creating a superuser in code. You cannot customize the superuser beyond the default fields provided by Django (username, email, password, first_name, last_name).
- This method may not be suitable for some scenarios where you need to create multiple superusers or automate superuser creation in scripts or deployments.
2. How To Create Django User From The Django Shell
The Django shell is an alternative way of accessing the database interactively. Meaning a line of code is run at the moment of its creation one by one.
Let’s see how we can create a Django superuser using the Django shell.
➊$ python manage.py shell
➋>>> from django.contrib.auth import get_user_model
>>> User = get_user_model()
➌>>> User.objects.create_superuser('username', 'email', 'password')
<User: username>
➍>>> exit()
Let’s see what the code above is doing.
➊ python manage.py shell is a command that we use to activate the Django shell. Once the shell is activated, this is shown by >>> at the beginning of each line we create.
➋ We import the User model from Django’s authentication system.
➌ We create a superuser with the create_superuser function which takes in 3 arguments namely, username which is your username, email, and password. The email is not required for the superuser to be created. If you decide to leave out the email, you have to specify the password’s argument. That is, you’ll have to type password = 'yourPassword'
After this, the user will be successfully created and this is shown by its username being printed out on the console.
➍ exit() takes you out of the Django shell. After then, you can run the server and log in to the admin panel using the details you gave.
You can also do this in one line:
$ echo "from django.contrib.auth import get_user_model; User = get_user_model(); User.objects.create_superuser('username', 'email', 'password')" | python manage.py shellOlder versions of this same code would be:
$ python manage.py shell
>>> from django.contrib.auth import User
>>> User.objects.create_superuser('username', 'email', 'password')
<User: username>
>>> exit()
Or the one-liner:
$ echo "from django.contrib.auth.models import User; User.objects.create_superuser('username', 'email', 'password')" | python manage.py shellAdvantages:
- This method is more flexible and allows for additional customization. You can add extra fields to the User model or create a custom user model that suits your needs.
- This method is useful for automating superuser creation in scripts or deployments. You can write code that creates superusers based on some conditions or inputs.
Disadvantages:
- This method requires more code and potentially debugging compared to the createsuperuser command. You need to know how the User model works and how to interact with it in code.
- This method may be less intuitive for beginners who are not familiar with Python or Django.
Conclusion:
I’ve shown you two methods to create a superuser in Django: using the createsuperuser command and creating a superuser in Django Shell. Both methods have their benefits and drawbacks, depending on your needs and experience level.
If you are looking for a quick and easy way to create a superuser, I recommend using the createsuperuser command. It does not require any coding and is suitable for beginners.
If you are looking for a more flexible and customizable way to create a superuser, I recommend creating a superuser in the Django Shell. It allows you to add extra fields to the User model or create a custom user model. It is also useful for automating superuser creation in scripts or deployments.
I hope this blog post has helped you understand how to create a superuser in Django. If you have any questions or feedback, please leave a comment below. Happy coding!
