LearnPython has the Biggest Discount Ever! ------ Get $349 $129 Lifetime Access to all 13 Python Courses
Django Imagefield: How to Upload Images in Django
Uploading images with Django is straightforward but contains a lot of steps. This post is going to show you how to use ImageField to upload images in Django.
This post is divided into 4 sections:
- SECTION 1: Configuring Your Django Project For Image Upload
- SECTION 2: Uploading Image with Django from Admin
- SECTION 3: Displaying The Image On the Front End
- SECTION 4: Uploading Image with Django from Front End
This post assumes that you have already created a Django project and you’re ready to add image uploading functionality to it.
Source Code:
Table of Contents: Upload Images in Django
- SECTION 1: Configuring Your Django Project For Image Upload
- SECTION 2: Uploading Image with Django from Admin
- SECTION 3: Displaying The Image In the Front End
- SECTION 4: Uploading Image with Django from Front End
- Wrap Up
SECTION 1: Configuring Your Django Project For Image Upload
First and foremost, there are a few Django settings we have to tinker with in order to allow image upload.
1. Install Pillow
First things first, you have to install Pillow in your Django project. Pillow is a Python Imaging library with moderately robust image processing capabilities and provides support for a wide variety of image file formats like png, jpeg, etc.
To install Pillow, activate the virtual environment of your Django project and run the following command:
(env) $ python -m pip install PillowPillow is the official Image processing library for Django, if you try to use ImageField without pillow, you’ll get a warning error.
After that is done, you can move on to the next step, you don’t have to add Pillow to installed apps in the settings.py file of the Django project.
2. Create a Django model with ImageField property and Include the upload_to() argument
Now that you have Pillow installed, you can then create a Django model with at least one of the fields using the Imagefield Property. Imagefield is the official field to upload images in Django.
As an example for this post, we will write a small model for uploading Books. Each book has a title, description, and cover. The cover is the field we will add the ImageField property.
from django.db import models

class Book(models.Model):
    title = models.Charfield(max_length = 200)
    description = models.Textfield()
    ➊cover = models.ImageField(upload_to = 'images/')

    def __str__(self):
        return self.title
In the above example model, pay attention at ➊. The Imagefield takes in many arguments, but for it to work, it is mandatory to add the upload_to parameter. As its name suggests, the upload_to parameter tells Django the folder to which the images will be uploaded. This folder should be a child folder of the Media_root folder. We will cover this in later sections.
cover = models.ImageField(upload_to = 'images/')The name of the folder can be anything, but the best name we can give it is images.
3. Register the Models In the admin.py file
Now after this, you have to register the model to the admin so that you can view it from the Django admin panel.
4. Add MEDIA_ROOT and MEDIA_URL in the settings.py file.
Next, we have to configure the MEDIA_ROOT and the MEDIA_URL in the settings.py file of our Django project. But let’s first see what these are before we move forward.
What Is MEDIA_ROOT?
MEDIA_ROOT is the path of the folder that stores the files that are uploaded by the users of your Django website. These files can be audio files, videos, etc but most importantly images which we are focusing on in this post. Add this line of code at the bottom of your settings.py file.
MEDIA_ROOT = BASE_DIR/'media'This means that there should be a folder called ‘media‘ at the root of your Django project that stores other media directories or files. The name of this folder can be anything, but the best name we can give it is so because it stores media files of our Django app.
What Is MEDIA_URL
MEDIA_URL is the URL of the Django media files. Every media file should start with this part of the URL and then be followed by the name of the file. We will cover how to do this in later chapters. Add this at the bottom of the settings.py file.
MEDIA_URL = '/media/'This means that each media file for this Django project will start with /media/ then followed by anything that we set it to be. For example, one image can be accessed by going to /media/django-book.png
5. Create the Media and Images folder
Up to this point, we have only made references to the folders that will store our files; but we haven’t really created the actual folders. This section will cover that.
At the root of your Django project, create a folder called media, then in the media folder create another folder called images. Do you see where this is coming from? Media is the MEDIA_ROOT and images is the upload_to parameter in the ImageField. Your project should look like this:
...
├── media
│    └── images
...
6. Add the URL pattern for the images
Let’s add the URL pattern for each of the images. In the urls.py file of your project, add the following code:
from django.contrib import admin
from django.conf import settings  # new
from django.urls import path, include  # new
from django.conf.urls.static import static  # new

urlpatterns = [
    path("admin/", admin.site.urls),
    path("", include("posts.urls")), # new
]

urlpatterns += static(settings.MEDIA_URL, document_root=settings.MEDIA_ROOT) #new
First, we include the urls.py of the app with the image model in the urls.py of the project.
SECTION 2: Uploading Image with Django from Admin
If your project’s image uploads are to be done by the staff members like superusers, Django offers an admin panel to do just that. In that case, you don’t have to write any more views to allow superusers to upload images. This is what we are going to look at in this section.
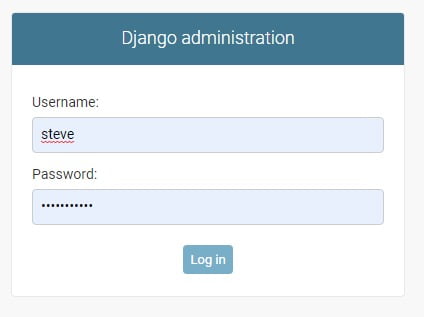
In order to access the Django Admin panel, we have to create a superuser. We will then use the superuser’s credentials to log into the admin.
(env) $ python manage.py createsuperuserThen we have to run the Django development server.
(env) $ python manage.py runserverNavigate tohttp://127.0.0.1:8000/admin and log in using the superuser credentials.
Then you should be able to see the Models that you registered to the Admin. In this case, It is the Book model. Let’s add an instance of this model.

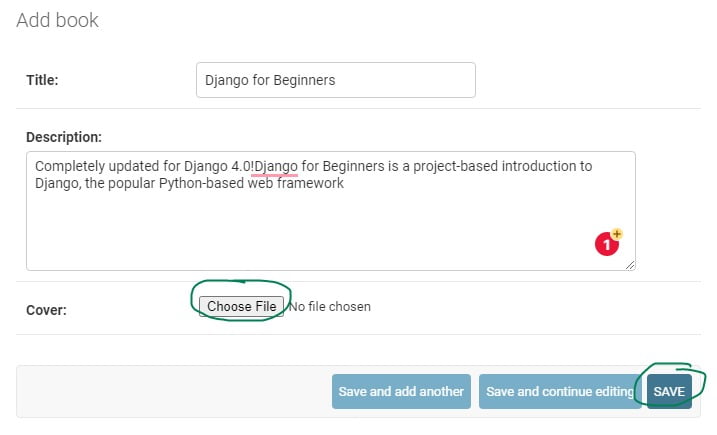
For the image field, click the ‘Choose File’ button and select the image file from your computer. After that, the name of the image and the size will appear beside the button. You can also write code to make the image display in the admin instead of appearing as just the name.

After that, hit the save button and the instance will be created.
Now, what would we do if you want to make the image appear on the front end? We’ll look at that in the next section.
SECTION 3: Displaying The Image In the Front End
1. Configure Templates For Your Django Project:
I have written a great guide on how to configure template files for a Django project. If you do not know how to do it, please take a look at it and come back.
2. Write A View to Pass Model Data to Templates
from django.shortcuts import render
➊from .models import Book

def index(request):
    ➋books = Book.objects.all()
    context = {
        'books': books
    }
    return render(request, 'index.html', context)
At ➊ we import the model that we want to render to the templates.
At ➋ we query the model to select all the instances in that model.
At ➌ we pass the data to the index.html file.
3. Write the URL for the View
from django.urls import path
from . import views #new

urlpatterns = [
    path('', views.index, name = 'home') #new
]
4. Write Code to display the Image in the front-end
Create a file called index.html in the templates folder of your Django project. Write the following code:
# templates/index.html
{% for book in books %}
<img src="{{ book.cover.url }}" width = '300'/>
<h5>{{ book.title}}</h5>
<p>{{ book.description}}</p>
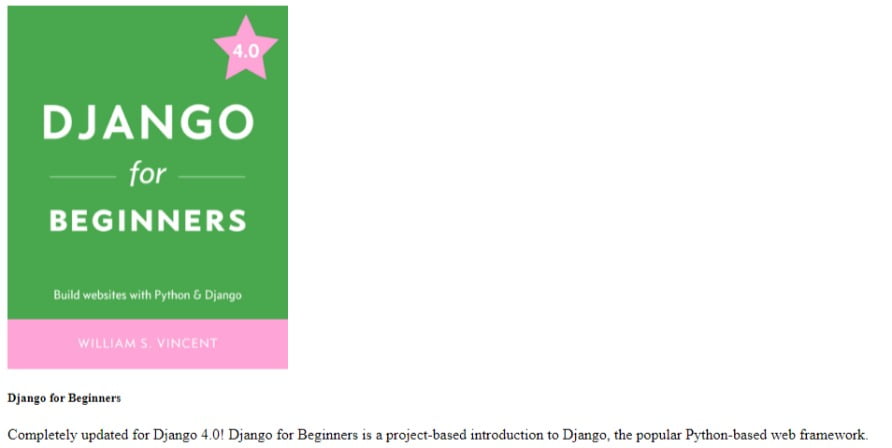
{% endfor %}Now run the server, go to http://127.0.0.1:8000, and if you did everything right, your web page should appear like this:
You can also style it further by applying bootstrap styling in Django templates.
SECTION 4: Uploading Image with Django from Front End
For now, we have uploaded an image with Django from the Admin. However, this can only be done by staff members of the Django project like superusers. To allow regular users to upload Images in your Django project, You have to create forms in the front end. This is what we will do in this section. Along with forms, we will also create views and URLs for uploading images with Django.
1. Create An Image Upload Form in the forms.py file
Our form is going to be a subclass of the ModelForm class. Model forms are forms with fields that inherit from existing models so we don’t have to define form fields again. We are going to use them for this example because we already have a model that contains all the fields we want for an image upload.
In the app folder, create a file called forms.py. And write the following code:
from django import forms
from .models import Book

class BookForm(forms.ModelForm):

    class Meta:
        model = Book
        fields = '__all__'
Since we are using ModelForm, we have to import the model that we are going to create a form for. Then we specify the model we want to create a model form for and the fields we want to include in the form. In this example, I included all fields but you can specify the ones that you want in a list.
2. Write the URL to Upload the Image With Django
Next, let’s create a URL pattern for the page that the user is going to upload the image from.
In the urls.py of your app, add the following line of code:
from django.urls import path
from . import views

urlpatterns = [
    path('upload/', views.upload_image, name = 'upload_image')
]
So if a user goes to http://127.0.0.1:8000/upload/, they are going to be presented with a form to upload the image along with other data for the form. This URL pattern sends a request to a view called upload_image upon submission. We haven’t created the view yet, so it’s time to do so.
3. Write A View to Pass Model Data to Templates
Next, we have to create a view for saving the data from this form. We will create a function-based view to do that.
In the views.py of your app. Add the following code:
➊from django.shortcuts import render, redirect #new
from .models import Book
➋from .forms import ImageForm #new

...

def upload_image(request): #new
    ➌if request.method == 'POST':
        form = BookForm(request.POST, request.FILES)
        ➍if form.is_valid():
            form.save()
        ➎return redirect(index)
    else:
        form = BookForm()
        context = {
            'form': form
        }
    ➏return render(request, 'upload_image.html', context)
At ➋ we import the form we have created before from the forms.py file of the same folder.
Then we create a view called upload_image that takes in a request from its corresponding URL pattern.
At ➌ we check if the user is uploading the image or not. How do we know that? Well, we check the HTTP method for each request that is being passed into the view. When a user gets on the page, the HTTP method is GET because they are getting data from the website’s database. But when the user posts something, then the HTTP method becomes POST because he or she is now posting to the website’s database.
So if the if statement returns a True, it means the user has posted something.
Now it’s time to validate that data and save it into the database. We do that at ➍ by using the is_valid() function and the save() method. Django will do the heavy work of validating this data.
After the data has been saved, we redirect the user to the home page where these images are displayed. We do that at ➎ using redirect() which we pass the name of the home page view. Note that we have also imported the function at ➊.
However, if the data is not valid then we just rerender the form on the page.
4. Create An upload.html file and Write the Code to Display the Form on the Front End
Now what we are left with to finally complete this cycle is to create the template that will have the form. Let’s do this in the same template for our homepage.
This assumes that your template files have already been configured.
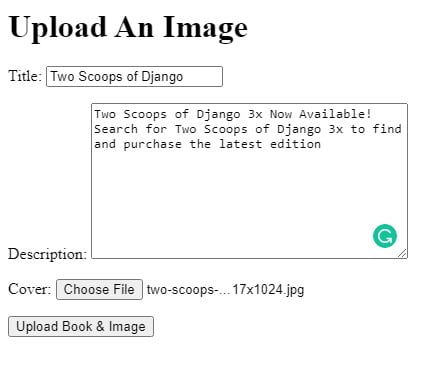
<h1>Upload An Image</h1>
<form method="post" enctype="multipart/form-data">
  {% csrf_token %}
  {{ form.as_p }}
  <button type="submit">Submit New Post</button>
</form>
This concludes the content of this post. Run the server of your Django app, and go to http://127.0.0.1:8000/upload/ and test your website out by uploading a few images. To make your life easier, you can also add a link on the home page to the upload page.
Wrap Up
Thanks for reading this post, please share it with fellow Django developers. If you have any questions, let me know in the comments section below. Otherwise, I’ll see you in other Coding Gear articles. If you want to check the full code, the link to the git repository is above.
Peace!
