LearnPython has the Biggest Discount Ever! ------ Get $349 $129 Lifetime Access to all 13 Python Courses
How to Connect PostgreSQL database to Django
This post is going to show you how to connect the PostgreSQL database to Django. PostgreSQL is one of the databases that are natively supported by Django.
When it comes to production development, SQLite (the default Django database engine) is not recommended. In that case, it is recommended to use other production-made database engines that are supported by Django like MariaDB, Oracle, MySQL, and PostgreSQL (which we are going to talk about in this tutorial).
It is also recommended that you configure the database right at the beginning when you’re creating a Django project and Django apps before you run your first migrations to avoid the small bugs caused by changing one database to another. That’s why this post is going to teach you how to connect Django with the PostgreSQL database from the very beginning when we install Django.
These are the steps to follow to connect the PostgreSQL database to Django:
- Download PostgreSQL from its website
- Install PostgreSQL on your Computer
- Create a Django project and Install psycopg2
- Create a Postgres Database
- Connect the Postgres Database to the Django project
- Test for the Connection
Table of Contents
- Step 1: Download PostgreSQL from its website
- Step 2: Install PostgreSQL on your Computer
- Step 3: Create a Django project and Install psycopg2
- Step 4: Create a PostgreSQL Database
- Step 5: Connect the PostgreSQL Database to the Django project
- Step 6: Test for the Connection
- Conclusion: How to Connect PostgreSQL database to Django
Step 1: Download PostgreSQL from its website
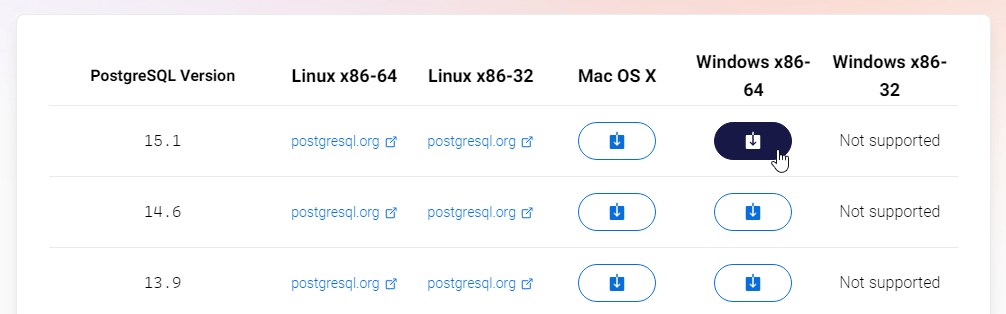
Go to https://www.enterprisedb.com/downloads/postgres-postgresql-downloads and click the download link for the Operating system you’re using.
As of the writing of this post, the latest PostgreSQL version is 15.1. It may be different for you depending on when you find this post. But as a recommendation, always download and use the latest stable version available.
Step 2: Install PostgreSQL on your Computer
On your computer, locate the installer of the Postgres Database and run it.
The Installation wizard should pop up. Let’s go through it together.
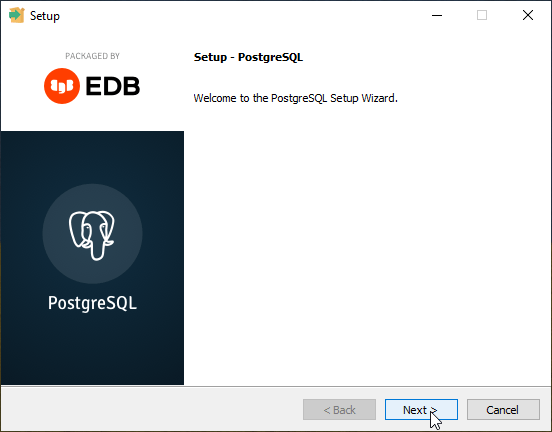
Click on next, at the bottom of the window.
Configure the Installation Directory
Choose the location you want PostgreSQL to be installed on your computer. Usually, leaving it as it is is the best option.

Select Components
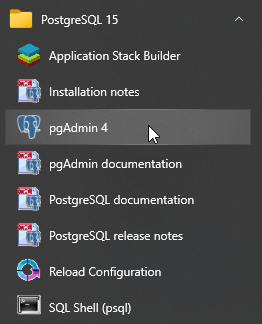
There are four components that will be installed in your computer with this PostgreSQL installation namely the PostgreSQL server, pgAdmin4, Stack Builder, and Command Line tools.
The PostgreSQL server is the server that will allow us to connect the PostgreSQL database with our Django project. pgAdmin4 is a graphical user interface to interact with our database. Stack Builder helps us with the installation of additional tools if they may be needed in the future. Command Line tools allow us to interact with our database in the terminal.
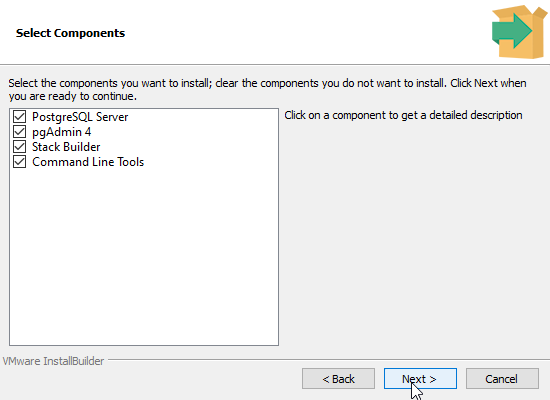
As you can see, all these components are important for a connection of the Posqresql database with Django. It is a good idea to install all of them. You can deselect Stack Builder, but not the rest of the components.
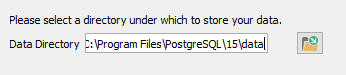
Choose the Data directory
The data directory is where your Postgres data like schemas will be stored. For the data directory, it is also best to leave it as it is.
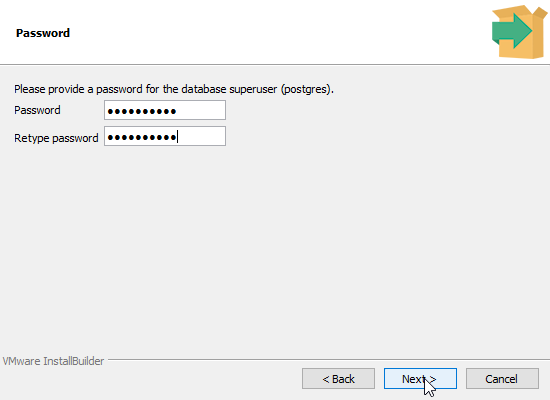
Create a Password
Next is the password window. Write a password that you’ll remember as you will use it for other uses like logging into the admin panel.
Port
Next is the port. For PostgreSQL, the default port is 5432. You can change it to something else, but it is best to leave it as it is. If you decide to change, make sure you won’t type in other application’s ports like 3306 of MySQL database.

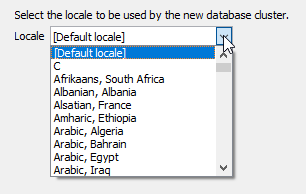
Select the Locale
Next, select your locale. A locale is a set of parameters that defines the user’s language, region, and any special variant preferences that the user wants to see in their user interface. You can also leave it on the [Default locale] if you prefer.
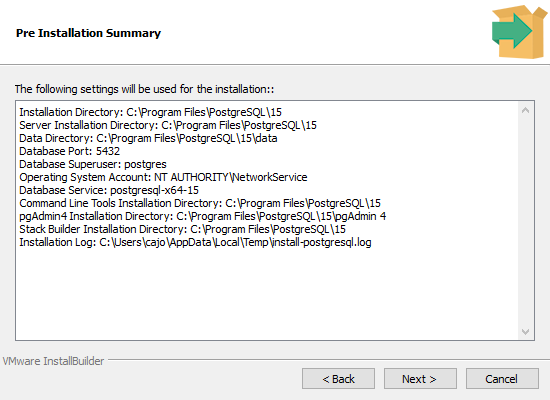
Finally, you’ll be provided with a summary of the options you have chosen. Make sure they are all correct before you click the next button.
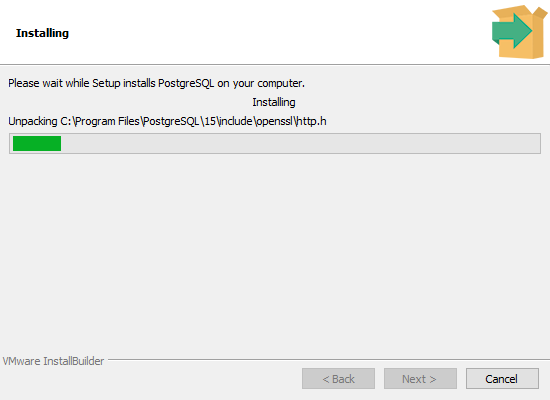
After you click the Next button, your Postgresql installation will begin.
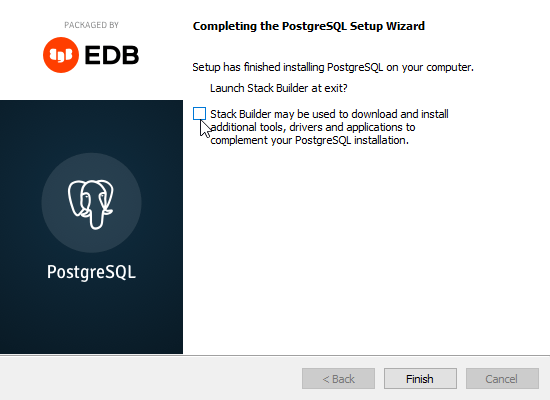
Uncheck the Stack builder checkbox
When the installation is complete, another exit window will pop up.
Make sure you unselect the Stack builder checkbox to prevent it from launching after you click on Finish at the bottom of the window. Stack Builder is used to installing additional tools, but what we need in order to work with Postgres and Django, at this point, has already been installed so there’s no need to launch it.
Congratulations, PostgreSQL has been successfully installed on your computer. Let’s now create a Django project and configure it for the PostgreSQL database.
Step 3: Create a Django project and Install psycopg2
1. Create a Django project
If you’ve already created a Django project, you can skip this step.
To create a Django project, create a folder on a preferable location on your computer and name it the name of your project.
➤Creating a Virtual Environment
Now open your terminal and cd into the project folder you created. In that folder we will create a virtual environment as follows:
$ python -m venv envenv is the name of our virtual environment, you can call it anything like venv, .env etc, as long as the name can tell that it is a virtual environment.
➤Activating the Virtual Environment
Next, we have to activate the virtual environment:
.\env\scripts\activateAnd after you activate it, the name of your virtual environment enclosed in brackets should appear at the start of the terminal command line. Like below:
(env) $That is how you can tell if a virtual environment is activated
➤Installing Django
Next, we have to install Django
(env) $ pip install django➤create a new project
After this, we can now create a Django project using the startproject command.
(env) $ django-admin startproject config .I like to call it config because we are already in a folder that has a name for our Django project. The . at the end tells Django to create the folder as a direct folder of the folder we are currently in on the terminal.
Your project structure should look something like this.
[project_name]
├── config
│   ├── __init__.py
│   ├── settings.py
│   ├── urls.py
│   └── wsgi.py
└── manage.py
For this tutorial, we are going to be working in the settings.py file of our Django project.
2. Install psycopg2 in your Django project
Now that we have a Django project, we have to install psycog2 which is the PostgreSQL database adapter that allows us to connect to Python apps, in this case, our Django project.
Open your terminal, cd into the project folder, activate the environment and run the following command:
(env) $ pip install psycopg2For this step, we are done, let’s create a PostgreSQL database and connect it to our Django project.
Step 4: Create a PostgreSQL Database
We can create a PostgreSQL database in two ways, either using the command line or the pgAdmin which is a graphical user interface. The choice is yours to choose what you want to use is yours.
Method 1: Create a PostgreSQL database using pgAdmin4
As you saw during the installation, Postgresql comes with a graphics interface called pgAdmin 4. If you prefer to work graphically, using the pgAdmin is the way to go.
The fatal error
In the previous versions of PostgreSQL, pgAdmin was rendered in a browser, but with version 15, pgAdmin 4 is now a desktop application. Some users have reported getting a fatal error when they try to open it, if you encounter that error as well, follow this guide on how to fix it.
The master password
If you open the pgAdmin for the first time, it will ask you to set a master password that will be used for the whole app. Note that it is not asking you to enter the password you entered during the installation but a new master password to add more security.

Log In to your server
In the pgAdmin4 dashboard, on the left panel, click the dropdown icon on Servers. We only have one server called PostreSQL 15 that was created for us by default. We are going to use that in this tutorial. If you want to learn how to create your own server, check out the documentation that comes with the installation.
Before you can access the server, you need to enter the password for the user postgres which you created during the installation.
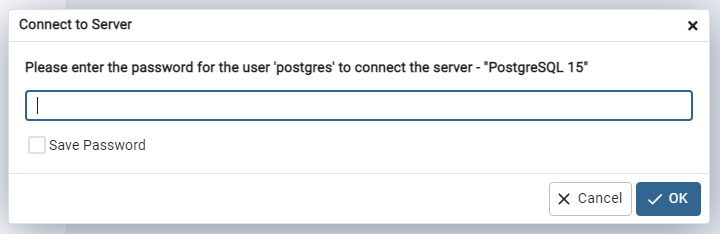
You can also check the Save Password checkbox if you don’t want to enter the password every time you want to access the server.
Create the Database
Next, right click on the server name, hover over the create option and click on Database.
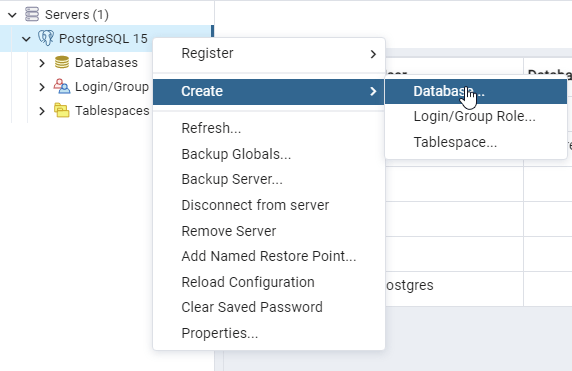
On the next window, the only important information to enter is the Database name. You can also configure other settings on the other tabs, but for now, it is enough.

Then click the Save button at the bottom right corner of the window.
After Saving, you should now see your database on the left panel:
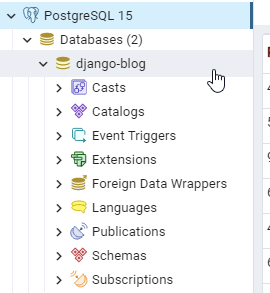
Okay, we’re done with creating the Postgres database, let’s now connect it to our Django project.
Method 2: Create a PostgreSQL database using SQL Shell (psql)
On Windows, make sure the path C:\Program Files\PostgreSQL\15\bin is added to the system PATH environmental variable. Note that it may be different for your computer, In that case, locate the folder called bin the programming folders of your PostgreSQL folder.
To continue, MicroFocus offers a great tutorial on how to create a PostgreSQL database using the command line.
Step 5: Connect the PostgreSQL Database to the Django project
Now we will connect the PostgreSQL database to the Django project we created in the previous sections.
Update the DATABASES dictionary
In the settings.py file of your project folder, update the DATABASES dictionary as follows:
DATABASES = {
    'default': {
        'ENGINE': 'django.db.backends.postgresql',
        'NAME': 'mydatabase',
        'USER': 'postgres',
        'PASSWORD': 'mypassword',
        'HOST': 'localhost',
        'PORT': '5432',
    }
}
Here is what each key is referring to:
• ENGINE: this is pointing to the database engine we are using; which is PostgreSQL. You can see the postgresql declaration at the end of the value.
• NAME: This is the name of your database (it should be exactly the same as you entered when you were creating the database, make sure there are no spaces in the string. If you somehow forgot the name, go back to your pgAdmin4 panel to check the list of databases you have.
• USER: USER is the username you used for the server you’re connected to. the default is ‘postgres’.
• PASSWORD: As the user, PASSWORD is the password you used to log into the server.
• HOST: The host here is referring to the IP address of the server, in this case, it is the localhost.
• PORT: This is the port on which your Postgresql server is running. By default, it is 5432.
When you upload your Django project to Github or to any other hosting service for software development, you should not leave sensitive information about your database exposed, like the database name, user, and password. Check out my post on how to use environmental variables to conceal the sensitive information.
Migrate the Models to the Database
After you make this connection, we have to migrate our models to the database. These models come with Django and you can see their apps in the list of INSTALLED_APPS in the settings.py file.
But If you had already created your own custom Django models, you need to make migrations first before you migrate the database by running the following command:
(env) $ python manage.py makemigrationsNote: If you had already entered some data before the switch, all of it will be wiped away. Even the super user if you’d created one. This is the reason why database integration is one of the first things you have to do whenever you start a project.
If your project is freshly new, just run the following command and you’d be good to go.
(env) $ python manage.py migrateAs the command is running, note all the models that are being migrated to the database, this means that we should be able to see the models in the database.
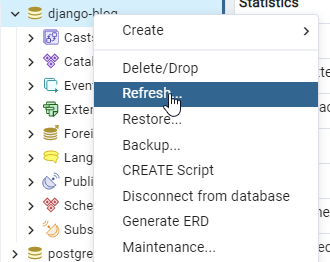
Step 6: Test for the Connection
Now we need to verify if our Django models are syncing or are reflecting in the database. Since Django comes with some pre-built models, we know that migrating the database will make them appear in the database. That is simply what we’re checking for:
So open your pgAdmin 4 dashboard and on your database, right-click and click on Refresh.
Now expand the Schema option, after that the Public option, and lastly the Tables option. There you will see the tables that are currently migrated to the database.
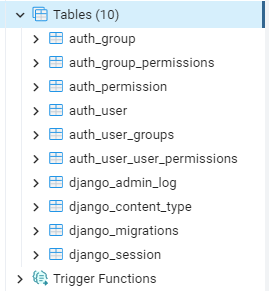
This alone will prove that the connection between our Django project and the PostgreSQL database is successful.
Conclusion: How to Connect PostgreSQL database to Django
Phew! This was a really long post, but I hope you made it this far. If you did, Congrats. Let me know in the comments section below if you have any questions or if you want to add something. See ya!
